How to burn a Video DVD using Windows DVD Maker
Tue, 01/23/2007 - 15:54 — George
![]() In this tutorial I will show you how to burn a Video DVD using only the functionality offered by the new Windows Vista operating system. Before we begin, I want to make some observations: making a Video DVD is not a difficult task and Windows Vista succeeded in offering a pretty good solution. However, there are many other software suites that offer plenty of features and make this job easier.
In this tutorial I will show you how to burn a Video DVD using only the functionality offered by the new Windows Vista operating system. Before we begin, I want to make some observations: making a Video DVD is not a difficult task and Windows Vista succeeded in offering a pretty good solution. However, there are many other software suites that offer plenty of features and make this job easier.
Nero and Roxio are two of the most popular solutions for burning CD's and DVD's. If you need more than just basic CD and DVD burning or you just want the “best there is”, then consider buying additional software like Nero or Roxio.
If you don't want to pay more money on software or you don't need more than just basic CD and DVD burning, then Windows Vista offers the perfect solution for you.
Now... let's show you how to burn Video DVD's in Windows Vista:
1. Click the "Start" button and select "Windows DVD Maker" (or go to Start -> All Programs -> Windows DVD Maker).
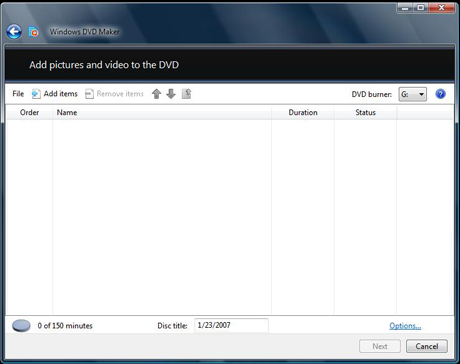
2. Click the "Add items" button from the top menu and browse to the folder were the movies you want to burn are located. By default, they should be found in the "Videos" folder.
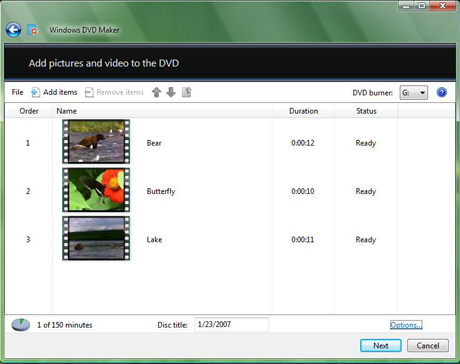
3. Select the movie(s) you want to burn and type the "Disc title". Also, you may select the order in which the movies will be saved on DVD. To do that, select a movie and press the "Up" or "Down" button to change its order.
4. If you want to, you can click the "Options" button and set things like the burning speed, the aspect ratio, the video format or you can choose if the DVD will have a menu or not.
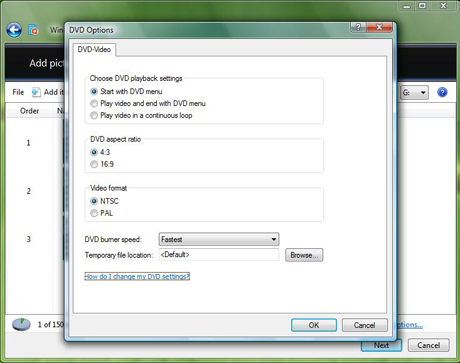
5. After you finished making the settings you want, click the "OK" button and then "Next".
6. At this step you can create a custom DVD menu or you can select a predefined one. To select a predefined menu, scroll the "Menu Styles" list and select the one you like most. You can customize it by pressing the "Customize Menu" button and making the settings you want. Also, you can change the menu text by clicking the "Menu text" button and typing the text you want for each button.
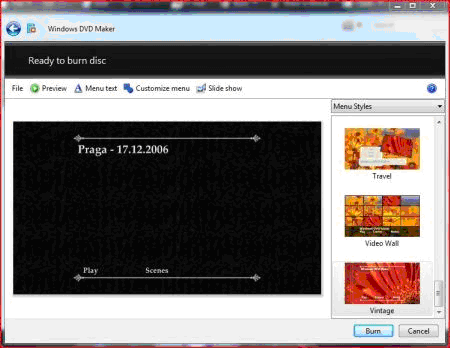
7. When you have finished making all the customizations, click the "Burn" button.
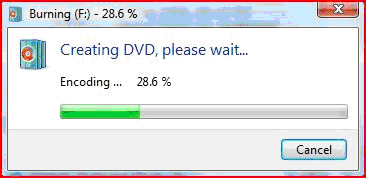
First, Windows DVD Maker will encode the movie in the appropriate format and then it will burn it on DVD. Usually, the encoding process takes much more time than the burning so you have to patient.
The movie that I burned on this Video DVD had 107 minutes and 21.6 GB. The time that passed since I hit the burn button and until the DVD was finished: 2 hours and 3 minutes.
Related articles:
How to burn CDs and DVDs in Windows Vista
How to burn an Audio CD
Windows Movie Maker
Recommended articles:
Windows 7: How To Burn DVD's With Windows DVD Maker

This work is licensed under a Creative Commons Attribution-Noncommercial 3.0 License.
Microsoft, Windows and the Windows logo are either registered trademarks or trademarks of Microsoft Corporation in the United States and/or other countries. Microsoft Corporation in no way endorses or is affiliated with www.vista4beginners.com.
All other products mentioned are registered trademarks and/or trademarks of their respective companies.
Comments
Program not available
I have a recent Tablet PC that is, by almost all accounts, a very good laptop (Tablet PC, Firewire, 100GB drive, 2GB RAM, 1.7GHz Pentium M, etc.). I recently upgraded to Windows Vista Ultimate by wiping the drive clean and installing Vista. Unfortunately for me, the embedded video card isn't up to Microsoft's Vista standards and Windows DVD Maker and Windows Movie Maker are not available to me. The error message given is "Windows Move Maker cannot start because your video card does not support the required levels of hardware acceleration or hardware acceleration is not available".
I find this incredibly annoying. I was able to use Windows Movie Maker just fine in Windows XP, and did so quite often. Now I am left with a really great computer that won't do what I need it to do.
I am quite frustrated! Be cautious when upgrading legacy hardware to Vista! The compatibility program said I couldn't run the AERO user interface, but did not mention that I couldn't run key programs in the operating system.
I was in the middle of
I was in the middle of burning a DVD with this program, trying to free up space on my laptop, and it was about 85% complete when a friend of mine shut down the computer.
At first it didn't seem as though my problems extended any further than a ruined DVD, but I've noticed that my movies take a long time to load up before they play now. Before it took no more than a second or two, now it takes about a minute. Also, the DVD maker doesn't work anymore either. It gets to step three alright, but it seems to stop at step five. I've made it to the actual burning process once, but after an hour it was still at 0%.
I was just wondering if anoyone knew the cause of this. I've replaced my decoders, but it hasn't helped.
Strange
That is a very strange behaviour and I'm afraid I don't have any solutions for you.
Maybe you should contact the Microsoft technical support team. They should be able to help you!
f***g vista and it's
f***g vista and it's glass. i want to use movie maker and use the extra visual features (which 2.6 does not have) I need it to make youtube poop at it's best quality. Is there a work around or patch that lets users use DVD and Movie Maker wihout DX9?
DVD won't play on normal players
I recently burned a DVD using DVD Maker with a DVD-RW. When I played it on my computer, it works fine, but everywhere else, it doesn't.
DVD that won't play
You might have better luck burning to a DVD-R. It's my understanding that format is more universal (it works well for me).
encoding stops at 5%
Using windows dvd maker and when it goes to encoding its very slow, i understand those processes can take some time so i left the computer and watched some tv come back and i get a error saying windows dvd maker has stopped working, and its always at 5% when i retry it, im using DVD RW and working with a Dell Dim521 can anyone help i would really like to know what the problem is. All ive done is tried to slow down the burning speeds faster > medium > slow but still end up with the same result
burning r5's
my dvd maker will not allow me to burn any movies that are r5 format what do i need to do. I have them downloaded but cannot burn them.
Thanks
upside down
Hello, when i put my movie into Windows Movie Maker, its upside down. I do the Rotate 180 effect, and everythings good. I then transfered it to Windows DVD Maker and everything looked good there too. Well, after the dvd burned, i popped it into my dvd player and its still upside down. WTF??? please help if you know.
I had the same problem,
I had the same problem, trying to use AVI files. I just downloaded a complete set of AVI codecs then the problem went away