How to configure the Taskbar and the Start Menu
Thu, 09/20/2007 - 21:11 — George
![]() Many people don't bother to configure their systems even though this might save them precious time in the future. Making a few changes can increase your productivity dramatically. In this article we will try to show you how to configure the Taskbar and the Start Menu so that you will have all the important shortcuts in one place. This will definitely save you precious time which is normally wasted by making endless clicks trying to find an application you need to work with.
Many people don't bother to configure their systems even though this might save them precious time in the future. Making a few changes can increase your productivity dramatically. In this article we will try to show you how to configure the Taskbar and the Start Menu so that you will have all the important shortcuts in one place. This will definitely save you precious time which is normally wasted by making endless clicks trying to find an application you need to work with.
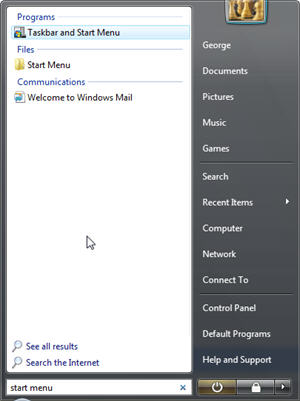
In the Start Menu search box type "start menu". You will see only one result named Taskbar and Start Menu Properties. Click on it, and the configuration window will open.
You can access it also if you right click on the taskbar and select Properties.
The configuration window has four tabs: Taskbar, Start Menu, Notification Area and Toolbars. We will try to cover the most important options from each of these.

How to customize the Taskbar
The Taskbar has the following configuration options: you can lock it, keep it on top of other windows or you can set it on auto-hide. You will see that, when auto-hide is enabled, the transition from hidden to visible is really smooth, unlike Windows XP - where the animation was a bit annoying.
Other available options are: "Group similar taskbar buttons" which groups all the open windows from one application into one taskbar button, "Show Quick Launch" which displays shortcut items and "Show window preview (thumbnails)" which shows a preview of any window when you move the mouse above one of the taskbar buttons.
How to customize the Start Menu
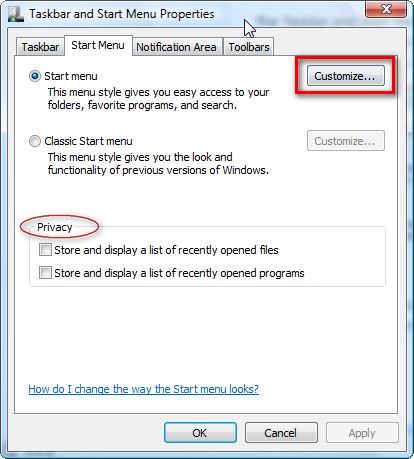
The second tab contains Start Menu settings. You can switch to the classical Start Menu or keep the new style. You also have the option to enable/disable the display of the recently used files and programs lists in the Start Menu.
Both types of styles for the Start Menu can be customized to your liking.
How to configure the new Start Menu style
Let's start configuring the default Start Menu style. First, click on the Customize button shown in the above screenshot.

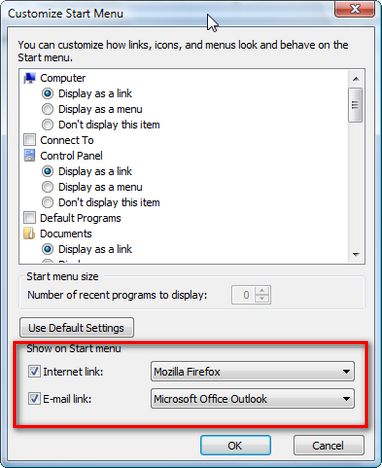
In the Customize Start Menu window, you can change the look and behavior of links, icons and menus. The scroll down list contains items which are shown in the right pane of the Start Menu. The rest of the available items are shown on the left pane.
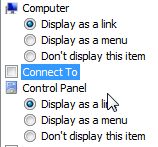
First, scroll down the items list from the top of the window and enable/disable the items you want to have on the right side pane.
If you have a laptop and you need to connect to different networks during the week, you might want to enable the Connect To.
You can also enable or disable the highlighting of the newly installed programs.
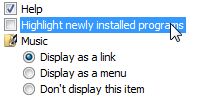
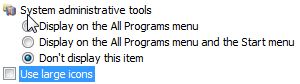
If the icons from the Start Menu are too small for you, you can click on the Use large icons option and solve this problem.
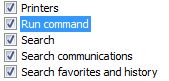
Other useful shortcuts that you might want to enable are Printers (if you have printers installed) and the Run command.
Feel free to experiment and customize so the Start Menu will fit your needs.
Like we mentioned earlier, the options from the lower part of the Customize Start Menu window affect the left pane. You can type the number of recent programs which should be displayed and you can enable/disable the shortcuts for the default internet browser and e-mail client.
Generally, we prefer to reduce the number of recent programs which are displayed on the left pane and pin the most used applications to that list. We will show you how to do that later.
How to configure the classic Start Menu style
If you prefer the classic Start Menu style, select it and then click on Customize.
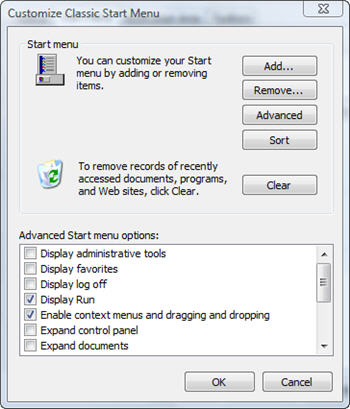
Customizing this menu might seem a bit complicated but it isn't. If you want to add an item, click on Add. A Create Shortcut wizard will start.
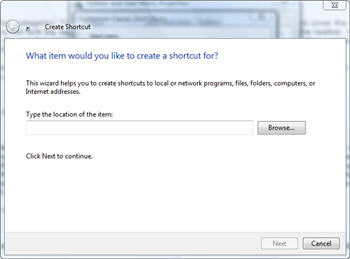
Click on Browse, select the item that you want to add and then click on Next.
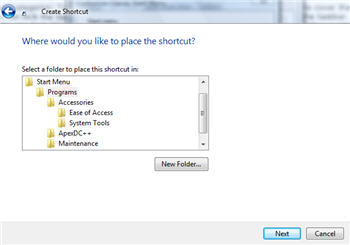
Select a folder where you want to place the shortcut or click on the New Folder button and create a new one. Type the name of the folder and click on Next.
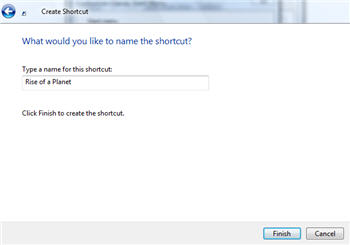
Type the name of the shortcut, click on Finish and the shortcut will be created in the location you specified.
If you want to Remove an item from the Start Menu, click on the Remove button.
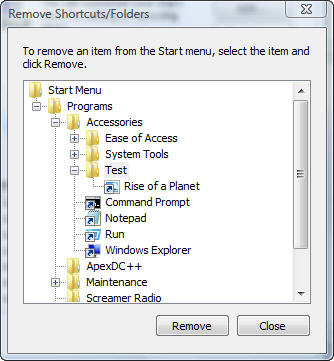
Browse to the shortcut or folder that you want to remove, select it and then click on Remove. If that is all that you want to remove, click on Close. Otherwise repeat the procedure until you have removed all the items you want from the Start Menu.
In the lower part of the Customize Classic Start Menu window you will find more options. Go through the list of available options and enable the ones you need. After you have made all the selections click on OK.
How to customize the Notification Area
The next category is the Notification Area.
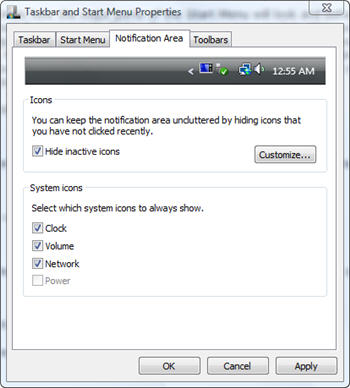
Here you can select to hide inactive icons and to hide/show system icons such as the clock, volume icon, network and power. You can also configure the icons for the applications that are currently running or which have ran in the past. To do this click on Customize.
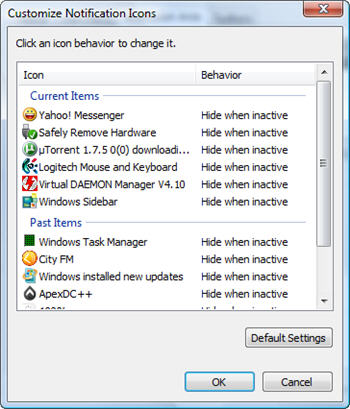
As you can see in the above screenshot, the application list is split in two: Current Items and Past Items. Click on a program icon and on the right you should see a small scroll-down list with three options: Hide, Show and Hide when inactive. Choose the option you prefer and then press on OK. If you are not happy with the changes you made, you can always click on Default Settings and all settings will be restored.
How to configure the Toolbars
The last category is called Toolbars.
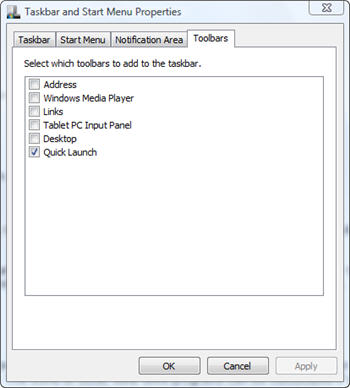
Here you can select the toolbars which you want to activate. The default list of available toolbars includes: Address, Windows Media Player, Links, Tablet PC Input Panel, Desktop, Quick Launch. Click on the ones you want to enable and they will appear in the taskbar.
How to pin items to the left pane of the Start Menu
Pinned items are shortcuts which appear on the left pane of the Start Menu until they are manually removed. You can pin shortcuts found anywhere on your Desktop or in the Start Menu and any executable file of any application.
To pin an a shortcut, right click on it and then select Pin to Start Menu.
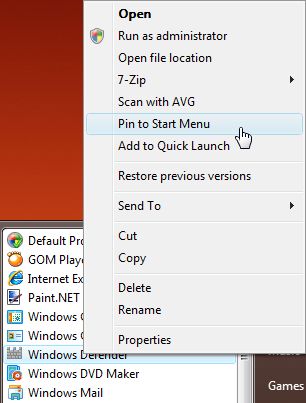
The same procedure can be applied for executable files (with the extension ".exe"). When you click on "Pin to Start Menu", Windows Vista will automatically create a shortcut for it on the left pane of the Start Menu. The created shortcut will have the same name as the file. You can always rename it by right clicking on it, selecting Rename and typing the new shortcut name.
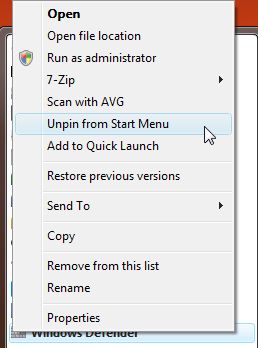
If you want to remove a pinned item, simply right click on it and select Unpin from Start Menu.
Related articles:
Switch back to the Classic Start Menu
Where is the Run button?
Put the Shut Down button back on your Start Menu
Put the Volume Mixer icon back on your taskbar
How to customize the Start Menu search box
Want larger Quick Launch icons in the Taskbar?
How to change Window Color and Appearance
Recommended articles:
Fix for When Clock, Volume, Power or Network Icons are Missing and Grayed Out in Windows Vista

This work is licensed under a Creative Commons Attribution-Noncommercial 3.0 License.
Microsoft, Windows and the Windows logo are either registered trademarks or trademarks of Microsoft Corporation in the United States and/or other countries. Microsoft Corporation in no way endorses or is affiliated with www.vista4beginners.com.
All other products mentioned are registered trademarks and/or trademarks of their respective companies.
Comments
One thing...
Great article guys! One thing though - the article says you can access the Taskbar and Start Menu Properties windows by typing in 'start menu' into the start search box, but this didn't work for me. However, you can just right-click on the Windows orb and select 'properties' to get to the same menu.
It works..
Hello Chris. Thanks for the appreciation and for posting a link on the Official Windows Vista Magazine site.
Both methods of accessing the Taskbar and Start Menu Properties work. We have tested on 3 computers with default settings for the Search Box and it works like a charm.
Maybe you have made a typo or something.
It definitely works, but
It definitely works, but only if you have the "Taskbar and Start Menu" option available somewhere within your start menu (as that what the search should find). Check if you've removed or disabled it.
show desktop icon
where did my show desktop icon go of the task bar
pin to right pane?
Great tutorial! Thanks.
Wondering though, how to create and/or pin new items into - onto the right pane of the start menu.
For instance, often I want to access my Video folder directly from here. I can access Pictures and Documents, but not videos. To get videos folder I have to drill down into my personal folder. Would be great if this kind of tweak were doable. Any ideas? Thanks.
I have docs, pictures, music
I have docs, pictures, music and games on the top of the right side of my start menu, but I would like to replace the games link for my movies folder which is on my secondary drive. Is this possible???
pin to left pane
sonny, Mike, unfortunately it is not possible to pin an item to the right pane of Start Menu, but you can easily pin items to the left pane of Start Menu. Simply drag the item to the start button and then, after Start Menu opens, drop the item in the upper part of the menu.
Also, you could do a trick: rename the items from the right pane to suits your needs; you can do this if you click on them and select Rename from the menu.
pin to left pane
Thanks for a great article! I had been trying to figure out how to pin a folder to the Start menu. When I right-clicked on the shortcut, there was not an option to "pin to" a location. The drag to the Start button and waiting till it opens, then dropping the item in the upper part of the (left) menu, worked great.
thumbnail preview of taskbar item
I have a Dell Vista-operated computer that crashed shortly after purchase. Local university computer staff fixed it, except they disabled an option I liked, previewing the items on the task bar with a thumbnail preview. I have found the place when I should be able to check to enable that, but the link (i.e., the little check-box) is disabled, and will not allow me to check it. How can I fix this? Thanks!
icon
1st: I am computer illiterate, so will probably use the wrong terms.
My question: When I 1st got my laptop with Vista there was an icon at the bottom that showed all the windows I had open and I could click on it and flip through and pick 1. It's gone, how do I find it to put back?
Hope someone understands me and can help. I'm sure it's simple.
Thanks
Post new comment