How to backup your data
Wed, 09/26/2007 - 21:21 — George
![]() Many people lose data everyday due to various reasons: virus infections, accidental deletion, hardware & software failures, power failures and so on. To protect yourself from data losses, you can create a backup so that you will easily restore it when needed. Using Windows Vista’s Backup and Restore center, you can easily backup your personal files or the entire system. You can create a manual backup or schedule automated backups which will add the new files or the modified files into your original snapshot.
Many people lose data everyday due to various reasons: virus infections, accidental deletion, hardware & software failures, power failures and so on. To protect yourself from data losses, you can create a backup so that you will easily restore it when needed. Using Windows Vista’s Backup and Restore center, you can easily backup your personal files or the entire system. You can create a manual backup or schedule automated backups which will add the new files or the modified files into your original snapshot.
In this tutorial we will show you how to backup your data. In the following weeks we will also publish a tutorial about restoring your data.
NOTE: Windows Complete PC Backup and Restore is not included in Windows Vista Home Basic or Windows Vista Home Premium.
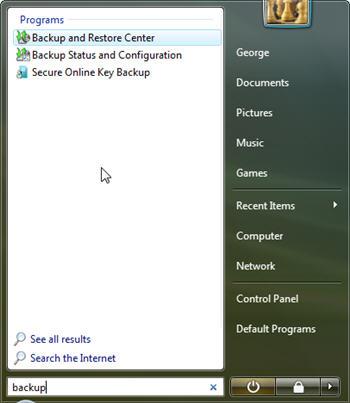
In the search field of the Start Menu type the word "backup" and then click on the Backup and Restore Center shortcut. Alternatively, you can go to Control Panel -> System and Maintenance -> Backup and Restore Center.
The Backup and Restore Center has two main sections: one for backing up files and one for restoring them.
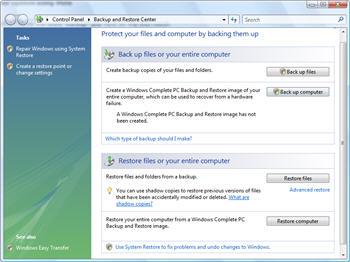
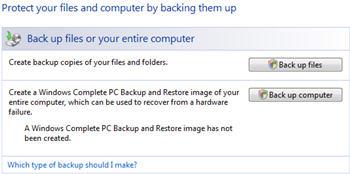
On top of this, the backup section offers another two options: Back up files and Back up computer. The first option will create a backup of your personal files and folders and the second will create a complete backup of your entire computer. It is recommended to create a full back up of your computer just after you have set up your computer for the first time. Windows Vista will take a snapshot of all your programs, settings and files. You can use this snapshot if your computer ever stops working and restore it to the original state.
How to backup your personal files and folders
To start the procedure, click on the Back up files button and the wizard will start.
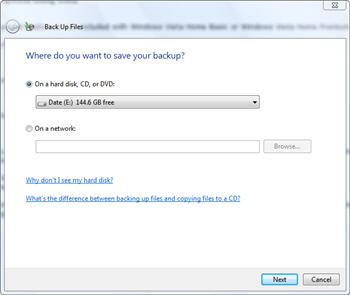
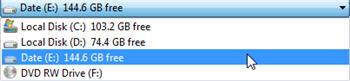
In the Back Up Files window you will have to select where to save your backup. You can select a partition from your hard disk, a CD, a DVD or a shared folder from your network. Select the location you prefer and click on Next.
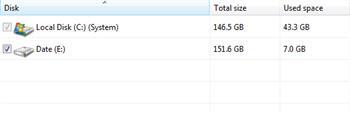
In the next window, you will see a list with all your partitions except the one selected as the location for saving your backup. The partition on which Windows Vista is installed will be selected by default. Now you can choose to include or exclude other partitions from the backup procedure. After you have made your selections, click on "Next".
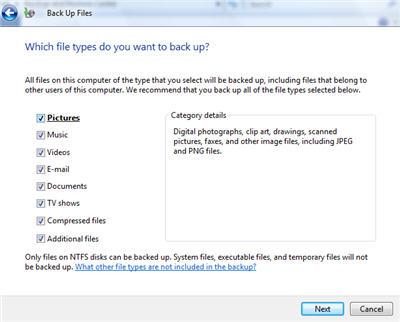
The wizard will now ask you to select the types of files you want to have backed up. You can choose any of the following: pictures, music, videos, e-mail, documents, tv shows, compressed files and additional files. Select the file types you want to include in the back up and click on Next.
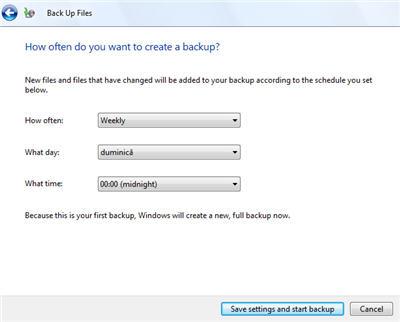
In the next window you will be asked about the frequency of the back up process. You can have daily, weekly of monthly backups. The scheduled backups will include only the new files or the modified files to the initial backup which you are about to complete.
Create the settings you want and then click on Save settings and start backup.
The backup process will start. First it will make a shadow copy, then it will scan the selected partitions for files and folders and then it will create the desired backup.
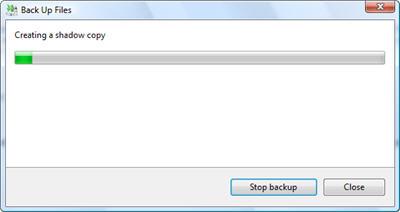
Depending on your system and on how much data you want to backup, the procedure will take from a few minutes up to a few hours. You can stop the backup at any time by clicking on Stop backup.
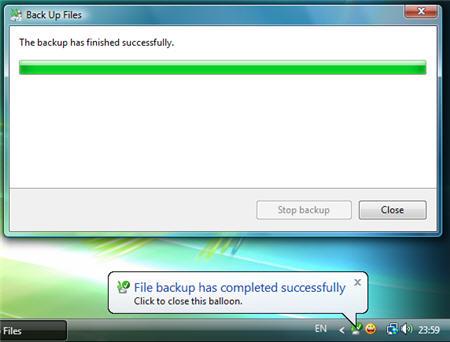
When the backup is completed you will see a balloon tip notification showing up on your screen.
How to reschedule or turn off your automated back up
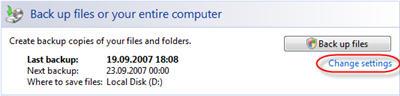
If you want to change the settings of the automatic backup procedure, go to the Backup and Restore Center and click on the Change settings link beneath the Backup files button.
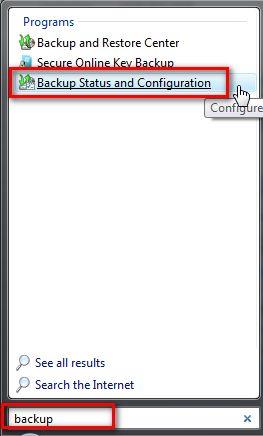
Alternatively, you can use the start menu search box, type "backup" and click on the Backup Status and Configuration shortcut.
The Backup Status and Configuration window will open. Here you will see the latest information about your backups.
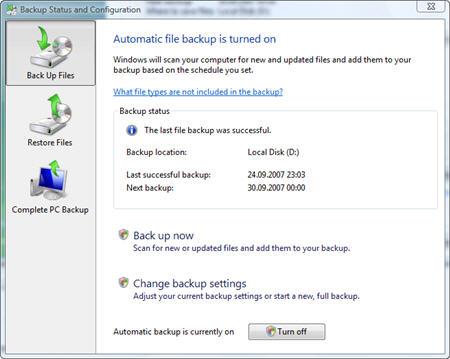
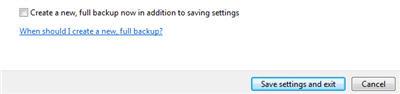
If you want to make a new backup, click on the Back up now button. To change the current settings click on the Change back up settings button. You will notice that if you want to change the settings, you will have to go through all the steps described in the screenshots above: selecting the drives, selecting the file types, selecting the schedule, and finally you will have to choose if you want to create a new backup or you just to save the settings and exit.
If you want to disable the automatic backup, click on Turn off.

Once you have finalized making all the desired changes, close the window.
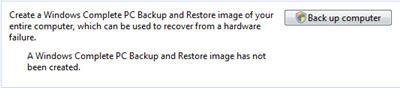
How to create a complete PC backup
To create a complete backup of your PC, go to the Backup and Restore Center and click on Back up computer to start the procedure.
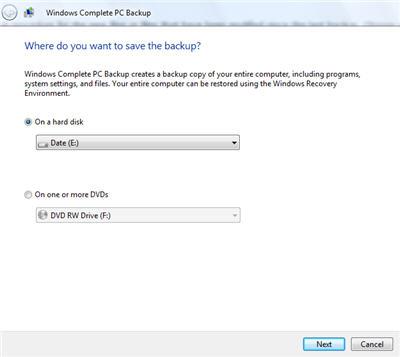
The wizard will start and it will ask you where you want to save the backup. You can select a hard disk or one or more CDs/DVDs. Make sure you have enough CDs/DVDs or sufficient space on your hard disk and then, after you have made your choice, click on Next.
In the next window you will need to select the partitions which you want to include in the backup. Make the appropriate selections and click on Next.
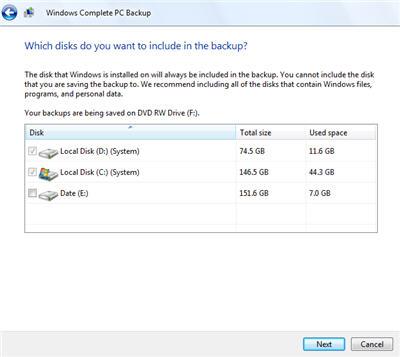
In the last window, the wizard will show you a summary of your backup settings: the backup location and the disks which will be backed up. In the Backup location field it will show you the number of DVDs required or the hard disk space required to save your backup.
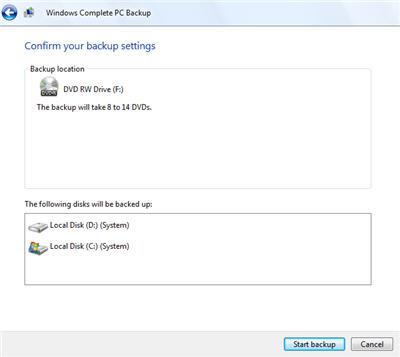
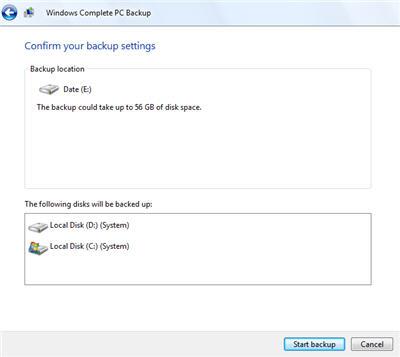
Click on the Start backup button and the procedure will begin.
NOTE: this tutorial was created with UAC turned off. If you have it turned on, you will have to make some additional confirmations for the changes that you want to apply.
Related articles:
How to restore your files
GFI Backup 2009 Home Edition - a worthy alternative to the Backup and Restore Center
System Restore
Backup your Outlook Inbox
How To Backup and Restore Your Windows Speech Recognition Profile

This work is licensed under a Creative Commons Attribution-Noncommercial 3.0 License.
Microsoft, Windows and the Windows logo are either registered trademarks or trademarks of Microsoft Corporation in the United States and/or other countries. Microsoft Corporation in no way endorses or is affiliated with www.vista4beginners.com.
All other products mentioned are registered trademarks and/or trademarks of their respective companies.
Comments
No, system backup really doesn't work with Vista Premium
I have a new ACER with Vista Premium, which came without a reinstall disk of any kind. Of course the Vista backup feature which is much touted gave me the impression I would be able to make a backup disk, so I turned down Best Buy's offer to make me a backup disk for "only" $40.
But apparently, to Microsoft "Premium" really means "cheapo," because they didn't include the system restore feature with it.
Reality check: YOU CANNOT back up a Vista Home Premium system, because it does NOT have a tool to create a backup image, just file backup.
What am I supposed to do if my hard drive crashes, buy an OEM version of Windows for $hundred$ to replace it?
At this point I'm having trouble deciding who sucks more, Microsoft, for not having the decency to include a system restore tool, or Acer, for being too cheap to throw in a $0.50 CD-ROM with a $700 laptop.
And then they wonder why people are switching to Linux...
I have an ACER laptop with
I have an ACER laptop with Vista Home Premium. You can use the ACER eRecovery management (that at least came with my computer) and choose burn disc -> burn factory default disc :)
System restore not available for Vista Premium
Note system restore does not work at all with Vista Home Premium edition, this tool is not included with the OS.
http://www.microsoft.com/windows/products/windowsvista/features/details/...
Thank you Microsoft
Whatever
I don't have to flippin' option to backup my computer. This would come in handy to me seeing as my computer skills have been fleeting lately and I've had to reinstall a few times. I'm running Home Premium.
DVD-R Backup media
i'm using vista ultimate. i'm trying to back up mu comp completely but using normal dvd-r NOT dvd-rw. how do i change this?
What do you mean?
What do you mean? You have a DVD Writer in your PC? If you have only a DVD Reader unit you cannot write any DVD's with it.
DVD-R Backup media
You should have the option to change your DVD-R to DVD-RW when you go to save it to disc. I do that all of the time when I do backup's.
Vista Backup
No he is correct the stupid Vista backup only works if you use DVD-RW DVD's. It won't do a backup to normal DVD-R DVD's.
How totally pathetic is that?
Is Microsoft on the same Planet as the rest of us or what? They tout Vista as being ground breaking Technology but in reality they are so far behind the real world that it is not funny.
I am so sick of Vista. I
I am so sick of Vista. I tried backing up using DVD-RW and still didn't work but it worked on my other computer(windows 7) Go figure
Indeed, the backup
Indeed, the backup application from Vista has some problems with DVD's. You can try another software, like Acronis True Image. It has 30 days trial period.
Post new comment